
Introduction
Textured ceilings are a great way to add depth and interest to any room. They can be created using a variety of materials such as joint compound, plaster, or drywall mud. Painting a textured ceiling can be tricky, but with the right preparation and techniques it’s possible to achieve a professional-looking result.
In this article, we’ll explore the step-by-step process for painting a textured ceiling. We’ll discuss how to prepare the surface, choose the right paint and tools, apply the paint, and troubleshoot common problems. With this information, you’ll be able to create a beautiful finished product that will last for years to come.
Step-by-Step Guide to Painting Textured Ceilings
Painting a textured ceiling requires careful preparation and attention to detail. Follow these steps for best results.
Preparing the Ceiling for Painting
The first step in the process is to prepare the ceiling for painting. This includes removing any loose paint, cleaning the surface, and applying a primer. Here’s how to do it.
Removing Loose Paint: If there are any areas of loose or flaking paint, they should be removed before painting. Use a putty knife or sandpaper to gently scrape away the old paint. Be sure to wear a dust mask while doing this to avoid inhaling any particles.
Cleaning the Surface: Once all the loose paint has been removed, the surface should be wiped down with a damp cloth to remove any dust and debris. Allow the surface to dry completely before proceeding.
Applying a Primer: Before painting, a primer should be applied to the surface of the ceiling. This will help the paint adhere better and provide a smoother finish. Choose a primer that is suitable for your type of textured ceiling (e.g. plaster, drywall mud, etc.).
Choosing the Right Paint and Tools
The next step is to select the right type of paint and tools for the job. Here are some things to consider when making your choices.
Types of Paints for Textured Ceilings: When choosing paint for a textured ceiling, look for a product that is specifically designed for textured surfaces. These paints usually contain binders that will help the paint adhere better to the uneven surface. It’s also a good idea to choose a paint with a high level of coverage, as this will make it easier to achieve a uniform finish.
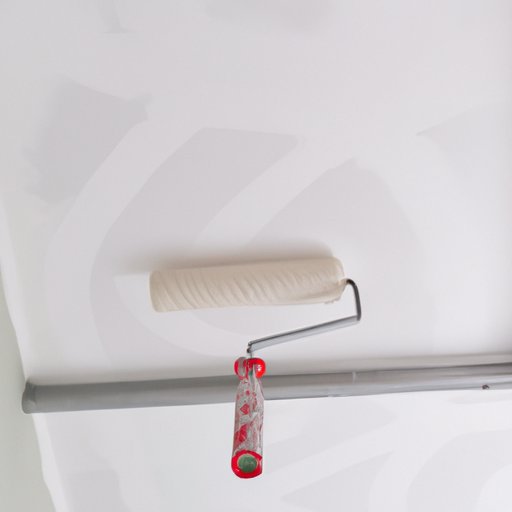
Choosing the Right Brush and Roller: The type of brush and roller you use will depend on the type of texture you have on your ceiling. For a light texture, a soft-bristled brush is best. For a heavier texture, a stiff-bristled brush is recommended. When selecting a roller, look for one with a thick nap (1/2″ or more) that will allow the paint to fill in the irregularities of the texture.
Applying the Paint
Now that you have the necessary supplies, it’s time to start painting. There are two main methods for applying paint to a textured ceiling: spraying and rolling.
Using a Sprayer: A paint sprayer is an effective way to cover a textured ceiling quickly and evenly. To use a sprayer, start at one corner of the ceiling and work your way across in overlapping strokes. Keep the nozzle about 12 inches from the surface and move it in a steady, sweeping motion. Be sure to keep the sprayer moving so that it doesn’t accumulate too much paint in one area.
Rolling on the Paint: If you don’t have access to a paint sprayer, you can use a roller to apply the paint. Start at one corner of the ceiling and roll the paint in small sections, working your way across the ceiling. Make sure to roll in a criss-cross pattern to ensure even coverage. Be sure to use light pressure to avoid pushing the paint into the texture.

Achieving Professional Results with Textured Ceiling Paint
To achieve a professional-looking finish, it’s important to understand the different levels of texture and how to apply the paint accordingly. Here are some tips for achieving a perfect result.
Understanding Texture Level: Textured ceilings can range from light to heavy. Light textures are best painted with a soft-bristled brush and a thin layer of paint. For heavier textures, a stiff-bristled brush and thicker coats of paint are recommended.
Working in Small Sections: To ensure even coverage, it’s best to work in small sections. Start in one corner of the ceiling and move across in small sections, overlapping each stroke slightly. This will help eliminate any lines or streaks.
Applying Multiple Coats: Depending on the type of texture and the color of the paint, multiple coats may be required for an even finish. Allow the first coat to dry completely before applying the second. This will help to ensure that the paint adheres properly and won’t peel off over time.
Tips for Preparing a Textured Ceiling for Painting
Before painting, it’s important to prepare the surface properly to ensure a smooth, professional-looking finish. Here are some tips for getting ready to paint.
Sanding the Surface: If the texture is very rough, it may be necessary to sand the surface before painting. Use a fine-grit sandpaper to gently sand away any bumps or imperfections. Be sure to wear a dust mask while doing this to avoid inhaling any particles.
Repairing Any Cracks or Holes: Any cracks or holes in the ceiling should be repaired before painting. Use a joint compound to patch up any holes and allow it to dry completely before painting.
Applying a Primer: As mentioned earlier, a primer should be applied before painting. This will help the paint adhere better and provide a smoother finish. Choose a primer that is suitable for your type of textured ceiling.

Choosing the Right Paint and Tools for Textured Ceilings
The right paint and tools will help ensure a professional-looking finish. Here are some tips for making the right choices.
Selecting the Right Type of Paint: It’s important to choose a paint that is specifically designed for textured ceilings. Look for a product that contains binders to help the paint adhere better and provides a high level of coverage. Be sure to choose a paint that is suitable for the type of texture you have on your ceiling.
Buying the Right Brushes and Rollers: The type of brush and roller you use will depend on the type of texture you have on your ceiling. For a light texture, a soft-bristled brush is best. For a heavier texture, a stiff-bristled brush is recommended. When selecting a roller, look for one with a thick nap (1/2″ or more) that will allow the paint to fill in the irregularities of the texture.
How to Apply Textured Paints for a Perfect Finish
Once you have the right paint and tools, it’s time to start painting. Here are some tips for achieving a perfect finish.
Spraying the Paint: If you’re using a paint sprayer, start at one corner of the ceiling and work your way across in overlapping strokes. Keep the nozzle about 12 inches from the surface and move it in a steady, sweeping motion. Be sure to keep the sprayer moving so that it doesn’t accumulate too much paint in one area.
Rolling on the Paint: If you’re using a roller, start at one corner of the ceiling and roll the paint in small sections, working your way across the ceiling. Make sure to roll in a criss-cross pattern to ensure even coverage. Be sure to use light pressure to avoid pushing the paint into the texture.
Blending Edges for a Seamless Look: To achieve a seamless look, it’s important to blend the edges where one section meets another. Use a brush to feather out the edges and create a smooth transition between sections.

DIY: Painting Textured Ceilings in Easy Steps
Painting a textured ceiling is a straightforward process that anyone can do. Follow these steps to get started.
Preparing the Ceiling: Begin by removing any loose paint, cleaning the surface, and applying a primer. Sand the surface if necessary, and repair any cracks or holes before painting.
Choosing the Right Tools: Select the right type of paint and brushes or rollers for the job. Choose a paint that is specifically designed for textured ceilings and a brush or roller that is suitable for the type of texture you have.
Applying the Paint: Use a sprayer or roller to apply the paint to the ceiling. Start at one corner and work your way across in overlapping strokes. For a seamless look, blend the edges where one section meets another.
Finishing Touches: Allow the paint to dry completely before adding any finishing touches. If desired, you can add trim or other decorative elements to complete the look.
Troubleshooting Common Problems with Textured Ceiling Painting
When painting a textured ceiling, it’s important to pay attention to detail and troubleshoot any issues that arise. Here are some common problems and how to fix them.
Patching Up Holes and Cracks: If there are any holes or cracks in the ceiling, they should be patched up before painting. Use a joint compound to fill in the gaps and allow it to dry completely before painting.
Avoiding Streaks and Lines: To avoid streaks and lines, it’s important to work in small sections and overlap each stroke slightly. This will help to ensure an even coverage.
Keeping the Paint from Peeling: Peeling paint can be a problem on textured ceilings. To prevent this, make sure to apply a primer before painting and choose a paint that is specifically designed for textured surfaces. Applying multiple coats may also be necessary for a uniform finish.
Conclusion
Painting a textured ceiling can be a challenging task, but with the right preparation and techniques it’s possible to achieve a professional-looking finish. Begin by preparing the surface, choosing the right paint and tools, and applying the paint. It’s also important to understand the different levels of texture and work in small sections for best results. With these tips, you’ll be able to create a beautiful finished product that will last for years to come.