Introduction
Sanding cabinets is an effective way to give them a new look or restore them to their original condition. Sanding removes old paint, varnish, and other finishes from cabinets, as well as any dirt, dust, and grime that may have accumulated over time. Sanding also helps to even out any imperfections in the wood, such as dents and scratches. By following the right steps, anyone can learn how to sand cabinets and achieve professional-looking results.
Step-by-Step Guide to Sanding Cabinets
Sanding cabinets requires patience and attention to detail, but it’s not difficult to do. Here is a step-by-step guide to help you get started:
Preparing the Cabinet
Before you begin sanding the cabinet, you’ll need to remove all drawers and doors. If the cabinet has any hardware, such as knobs or handles, these should be removed as well. Use a screwdriver to unscrew the hardware, then set it aside for later. Next, use a vacuum cleaner to clean the surfaces of the cabinet thoroughly. This will help to ensure that all dust and debris are removed before you start sanding.
Choosing the Right Sandpaper
Once the cabinet is prepped, it’s time to choose the right sandpaper. The type of sandpaper you use will depend on the type of finish you are trying to achieve. For example, if you are looking for a smooth, glossy finish, you should use a fine-grit sandpaper (around 150-grit). For a more rustic, distressed look, you should use a coarser grit (such as 80-grit). You should also be sure to use a sandpaper that is specifically designed for use on wood surfaces.
Sanding the Cabinet
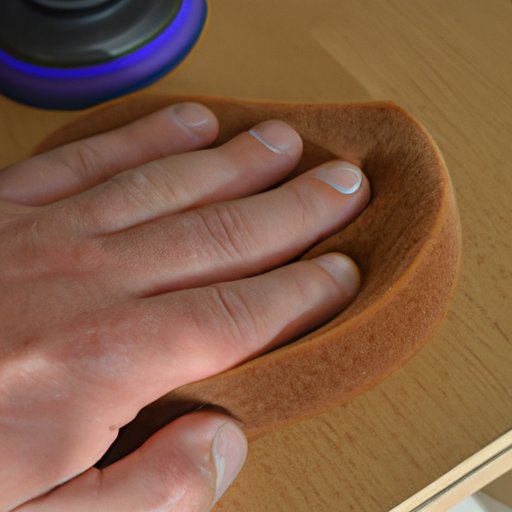
Now it’s time to actually start sanding the cabinet. Start by sanding with the grain of the wood, using long, even strokes. Be sure to apply light pressure, and work in small sections at a time. Once you have finished sanding one section, move onto the next. Continue until the entire cabinet has been sanded.
Finishing the Cabinet
When you have finished sanding the cabinet, wipe it down with a damp cloth to remove any remaining dust and debris. Then, apply a coat of primer to the surface of the cabinet. Allow the primer to dry completely before applying your chosen finish. You can choose between a variety of finishes, such as paint, stain, or varnish. Allow the finish to dry completely before reattaching the hardware and putting the drawers and doors back in place.
Tips for Refinishing Cabinets with Sanding
Sanding cabinets is a great way to give them a fresh, new look, but there are a few things you should keep in mind to ensure the best possible results. Here are some tips for refinishing cabinets with sanding:
Use the Correct Equipment
It’s important to use the correct equipment when sanding cabinets. Be sure to use a high-quality sandpaper with the appropriate grit for the job. Also, make sure to use a vacuum cleaner to remove dust and debris, and wear protective gear, such as goggles and a dust mask.
Prepare the Surface Properly
Before you start sanding, make sure to prepare the surface properly. Remove all drawers and doors, as well as any hardware, and use a vacuum cleaner to clean the surfaces of the cabinet. This will help to ensure that you get the best possible results.
Take Your Time
Sanding cabinets is a labor-intensive process, so be sure to take your time. Rushing through the process can lead to mistakes, which could ruin your results. Take your time and follow each step carefully to ensure the best possible outcome.

DIY: Sanding Cabinets the Right Way
If you’re looking to save money and do the job yourself, sanding cabinets is a great option. Before you start, it’s important to gather the essential tools and materials. You’ll need sandpaper, a vacuum cleaner, protective gear, and the appropriate finish for your project. It’s also important to follow safety precautions when sanding, such as wearing protective goggles and a dust mask.

How to Achieve Professional Results Sanding Cabinets
If you want to achieve professional-looking results when sanding cabinets, it’s important to use high-quality materials. Invest in good-quality sandpaper and finishes, and take your time to ensure a smooth, even finish. Patience and attention to detail are key to achieving the best results.

Essential Tools and Techniques for Sanding Cabinets
In addition to high-quality materials, there are certain tools and techniques that are essential to achieving the best results when sanding cabinets. It’s important to select the right sandpaper for the job, use appropriate sanding techniques, and use a vacuum cleaner to remove dust and debris. Taking care when sanding will help to ensure a smooth, even finish.
A Beginner’s Guide to Sanding Cabinets
Sanding cabinets can seem intimidating, but with the right tools and techniques, anyone can do it. Before you start, it’s important to understand the basics. Make sure you have the right tools, such as sandpaper, a vacuum cleaner, and protective gear. When sanding, take care to follow the grain of the wood and apply light pressure. With patience and attention to detail, anyone can learn how to sand cabinets and achieve professional-looking results.
Conclusion
Sanding cabinets is an effective way to give them a new look or restore them to their original condition. With the right tools and techniques, anyone can learn how to sand cabinets and achieve professional-looking results. Be sure to use high-quality materials, practice patience and attention to detail, and follow safety precautions when sanding.


