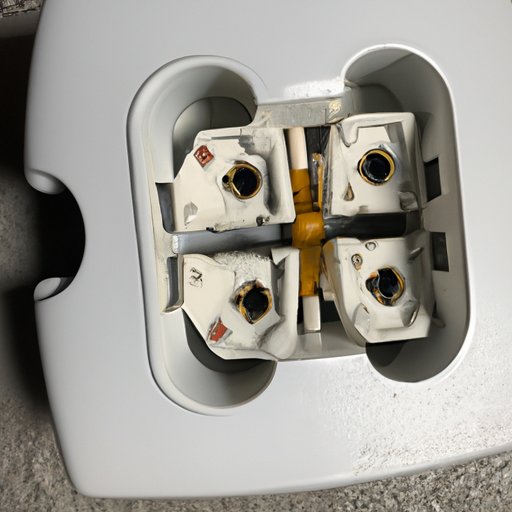
Introduction
Wiring a four-pronged dryer plug is an essential skill for any homeowner or handyman. Knowing how to safely install and wire a 4 prong dryer plug is important not only for convenience but also for safety. In this article we will discuss the basics of a 4 prong dryer plug, why it’s important to know how to wire one, and provide a step-by-step guide on how to properly install a 4 prong dryer plug.
Overview of 4 Prong Dryer Plug
A 4 prong dryer plug is a four-wire cord that is used to connect a dryer to a power source. The four wires consist of two hot wires (black and red), one neutral wire (white), and one ground wire (green). These wires are connected to the terminal block of the dryer and then connected to the power source. The four-prong plug is designed to help prevent electric shock by ensuring proper grounding of the appliance.

Why Knowing How to Wire a 4 Prong Dryer Plug is Important
Knowing how to wire a 4 prong dryer plug is important for several reasons. First, it is important for safety. An improperly wired dryer can cause serious problems such as electric shock, fires, and even death. Second, a properly wired dryer will ensure that the appliance runs efficiently and effectively. Finally, knowing how to wire a 4 prong dryer plug is also important for convenience. A properly wired dryer means that you can quickly and easily connect the appliance to a power source without having to worry about any potential hazards.
Step-by-Step Guide to Wiring a 4 Prong Dryer Plug
Installing a 4 prong dryer plug is a relatively simple process. However, it is important to follow the instructions carefully and take safety precautions. Here is a step-by-step guide to wiring a 4 prong dryer plug:
Gather the Necessary Materials
Before beginning any electrical work, it is important to make sure that you have all of the necessary materials. You will need a 4 prong dryer plug, a screwdriver, needle nose pliers, wire cutters, wire strippers, and electrical tape. You may also need an outlet tester, depending on the type of installation you are doing.
Remove the Existing Plug
Once you have gathered the necessary materials, you can begin the installation process. Start by unplugging the dryer from the wall and removing the existing plug. Be sure to turn off the power before attempting to remove the plug. Once the plug is removed, inspect the wires and terminals to make sure they are in good condition.
Connect the Wires
Next, you will need to connect the wires to the new 4 prong dryer plug. Start by stripping the insulation from the end of each wire using wire strippers. Then, twist the exposed copper wire together and insert them into the appropriate terminal on the dryer plug. Make sure that the terminals are firmly secured to the plug.
Attach the Ground Screws
Once the wires have been connected to the dryer plug, you can attach the ground screws. Attach the green ground wire to the ground screw on the dryer plug. Then, tighten the screw securely. Make sure that the ground wire is tightly connected to the ground screw.
Secure the New Plug
Finally, secure the new plug to the dryer. Carefully insert the plug into the outlet and press firmly until it is securely in place. Once the plug is installed, turn the power back on and test the connection.
A Beginner’s Guide to Wiring a 4 Prong Dryer Plug
If you are a beginner, there are a few things you should keep in mind when wiring a 4 prong dryer plug. First, it is important to identify the wires correctly. This means knowing which wire is hot, neutral, and ground. It is also important to determine the proper connections before beginning the installation. Finally, it is important to follow safety precautions when working with electricity.
How to Safely Install a 4 Prong Dryer Plug
When installing a 4 prong dryer plug, it is important to take safety precautions. Before beginning the installation, make sure to wear protective gear such as gloves, goggles, and a face mask. Additionally, it is important to turn off the power supply before beginning any work. Finally, know your limits. If you are unsure of how to properly install a 4 prong dryer plug, it is best to hire a professional electrician.

Troubleshooting Tips for Wiring a 4 Prong Dryer Plug
If you are having trouble with your 4 prong dryer plug, there are a few troubleshooting tips that you can use. First, check the wiring to make sure all of the connections are secure. Next, look for any loose connections and make sure they are tightened. Finally, test the circuit to make sure that everything is working properly.

DIY: How to Wire a 4 Prong Dryer Plug
If you’re feeling confident, you can try wiring a 4 prong dryer plug on your own. Before beginning, review the installation instructions and make sure that you understand all of the steps. Gather all of the necessary tools and materials. Cut, strip, and connect the wires according to the instructions. Finally, test the connection to make sure that everything is working properly.
Conclusion
Wiring a 4 prong dryer plug is not a difficult task, but it is important to follow the correct steps for a safe and successful installation. In summary, the steps for wiring a 4 prong dryer plug include gathering the necessary materials, removing the existing plug, connecting the wires, attaching the ground screws, securing the new plug, and testing the connection. Remember to always wear protective gear, turn off the power supply, and know your limits when working with electricity.


